When replicating an ADAM or AD LDS instance, it may be not be practical to use the domain Administrator account. Alternatively, you can add a limited Windows account to the Administrator group before performing the replication.
To add a limited Windows account to the Administrator group in Windows Server 2008
Log into the Application Server running Windows Server 2008.
Select Start > Server Manager.
In the left-hand pane, expand the Roles node and click Active Directory Lightweight Directory Services.
In the right-hand pane, find the Advanced Tools section and click ADSI Edit.
In the ADSI editor, create a connection to an AD LDS instance.
Right-click ADSI Edit in the left-hand pane and select Connect To.
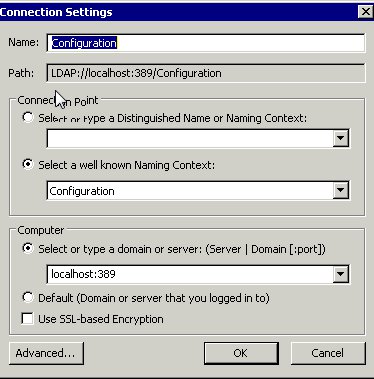
Enter values into the Connection Settings dialog as shown in the image that follows and click OK.
Add the current user account to the Administrator group.
Under the ADSI Edit node, expand Configuration [localhost:389] and click CN=Roles.
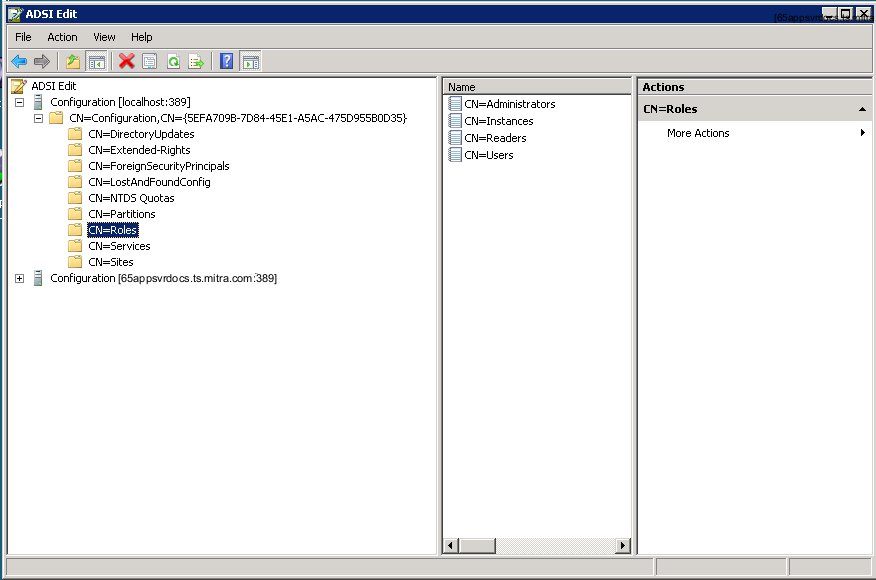
In the center pane, right-click the CN=Administrators role and from the drop-down menu, select Properties.
In the CN=Administrators Properties dialog, scroll down to the member attribute and click Edit.
The Multi-valued Distinguished Names With Security Principal Editor dialog is displayed, showing the list of users associated with the member attribute.
Click Add Windows Account.
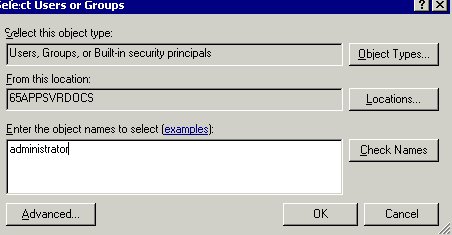
In the Select Users or Groups dialog, type administrator and then click OK.
The account name appears in the Multi-valued Distinguished Name With Security Principal Editor dialog as a member of the Administrator group.
Click OK twice to return to ADSI Edit.